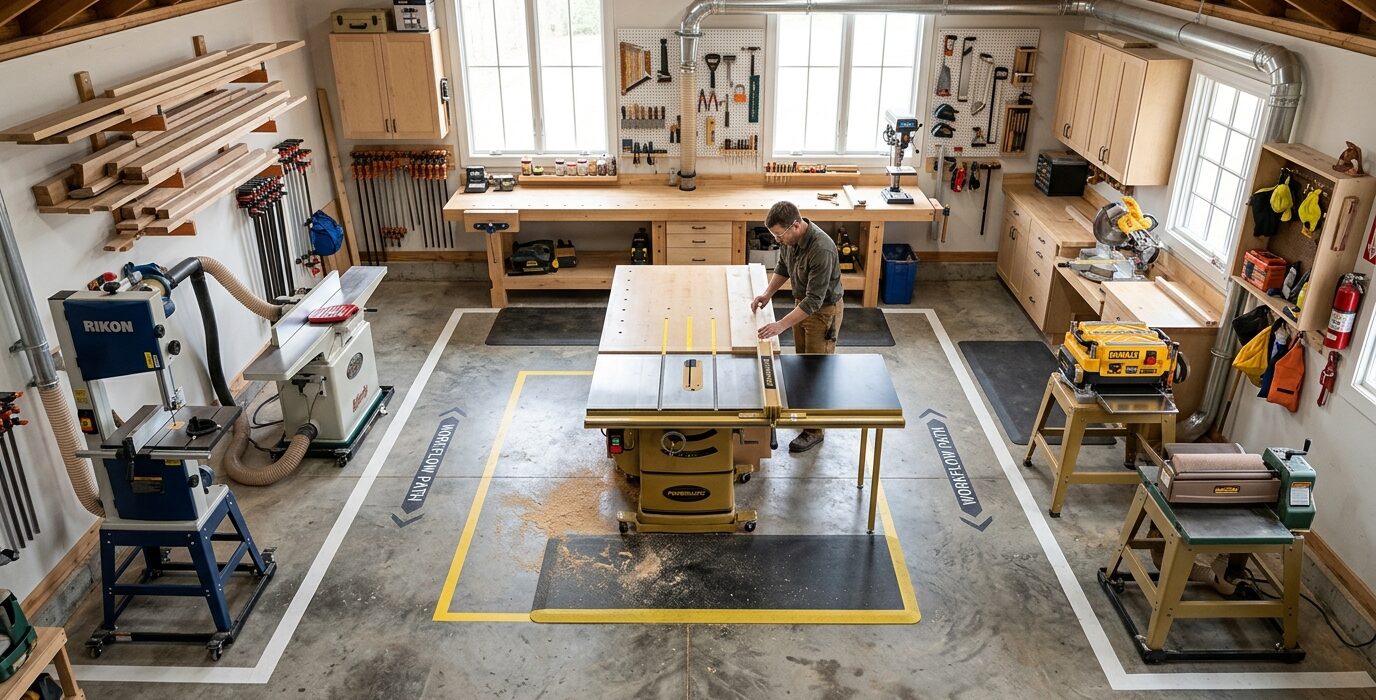
A Real Tour of a Real Two-Car Garage Shop
This tour documents a two-car garage workshop built over five years by a hobbyist furniture maker with a background in framing. The shop started as a single table saw against one wall; it’s now a fully equipped production space with dedicated zones for milling, assembly, finishing, and sharpening. The lessons learned along the way are worth more than the tool list.
The Space
The garage is a standard two-car detached unit: 22×22 feet (484 square feet). The floor is painted concrete with anti-fatigue mats at the three primary work stations. The ceiling is 9 feet with open rafters – lumber and sheet goods store on ceiling-mounted racks. The garage door side faces east, so morning light comes in but the shop doesn’t overheat in summer afternoons.
The Layout
The shop divides into four zones. The milling zone (back left corner) holds the table saw, jointer, and thickness planer – the heavy-iron machines that process rough lumber into flat, square stock. The assembly zone (center) is dominated by a 36×72-inch assembly table at workbench height, with the workbench against the back wall behind it. The finishing zone (back right corner, near the window) has a spray booth enclosure with an exhaust fan. The hand-tool zone (right wall above the bench) holds the tool cabinet, chisel rack, plane till, and sharpening station.
The Machines
- SawStop PCS 1.75 HP table saw (upgraded from a contractor saw after year 3)
- Powermatic 60HH 6-inch jointer
- Dewalt 734 thickness planer on a mobile base
- Rikon 10-305 14-inch band saw
- Jet 1340M drill press, floor model
- Oneida Gorilla dust collector, 1.5 HP
What Took the Longest to Get Right
Dust collection was rebuilt twice. The first system (shop vac plus drop hose) worked but required constant hose moving and never captured more than 60% of dust. The second system (dedicated 1.5 HP collector with 4-inch drops at each machine) eliminated most of the dust problem. The second lesson: outfeed support for the table saw. The first three years involved fighting long boards off the back of the saw. The outfeed table, added in year four, was immediately the most-used shop addition ever made.
Workflow from Rough Lumber to Finished Piece
- Rough lumber arrives and goes on the floor-level drying rack (east wall)
- After acclimating, lumber moves to the jointer for face reference
- Planer to final thickness
- Table saw for ripping to width
- Miter saw station for crosscutting
- Bench for joinery layout and chopping
- Assembly table for glue-up
- Back to bench for final fitting and hand work
- Finishing zone for surface prep and finish application
Lessons Learned
- Buy the best table saw you can afford in year one – upgrading later means selling at a loss
- Dust collection before tools – a shop without dust control is a health hazard, not a workshop
- Mobile bases on everything including the workbench (mounted on a rolling platform that locks against the wall)
- Lighting – 12 LED shop lights replaced 4 fluorescent fixtures; the shop is unrecognizable
- The finishing zone needed better exhaust than it got in year one; retrofitting was harder than doing it right initially
FAQ
What’s the one thing you’d change?
Electrical first, everything else second. The shop started with one 15-amp circuit from the house panel. Year two added a subpanel with four circuits – two 240V for machines and two 120V for lighting and outlets. Doing this upgrade in year one instead of year two would have been far less disruptive and slightly cheaper (less drilling through finished walls).