
A Shop Sink Changes Everything
Adding a utility sink to a garage shop may seem like an extravagance, but it changes the quality of every shop session. Cleaning brushes without walking to the house. Washing hands between finishing and handling wood. Mixing wood conditioners. Filling spray bottles. All of these tasks that currently require leaving the shop become immediate and convenient with a shop sink. This is a project-level upgrade that most woodworkers who’ve done it report as one of their best shop investments.
Planning Considerations
Before installing a shop sink, you need to address three practical questions:
- Water supply: Where will cold water come from? Most garage shops tap into the main water supply line in the basement or utility room with a run to the garage.
- Drain: Where will the water go? You need a drain connection – floor drain if you have one, or a drain run to the main house drain line.
- Local permits: Some municipalities require permits for adding plumbing. Check before starting work.
Materials
- Utility sink (plastic or stainless, free-standing or wall-mounted)
- Supply shut-off valve
- Faucet suitable for a utility sink
- P-trap and drain connection hardware
- Supply lines (copper, PEX, or CPVC)
- Optional: water filter for the finishing area supply line
Step 1 – Choose the Sink Location

Position the sink near a wall where running supply and drain lines is most practical. Near the finishing area is ideal – you’ll be cleaning brushes and mixing water-based finishes most often there. Keep the sink away from the main machine area to prevent water contamination of wood and finishes in storage.
Step 2 – Run the Supply Line
Tap into an existing supply line in the basement or garage with a tee fitting and shut-off valve. Run 1/2-inch PEX or copper from the tap to the sink location. Install a shut-off valve at the sink for seasonal water shutoff in cold climates. PEX is the easiest to route through walls and around obstacles – it’s the right choice for most DIY installations.
Step 3 – Install the Drain
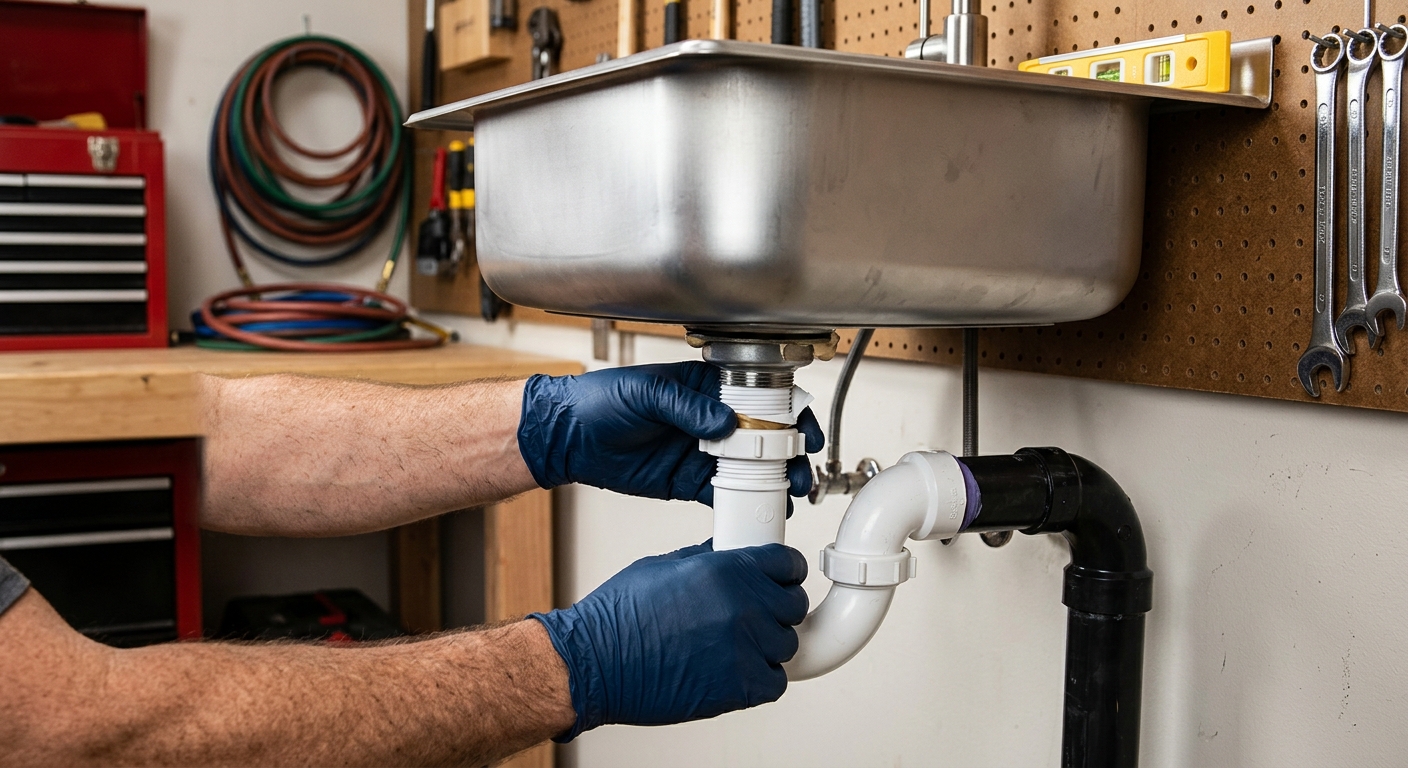
Connect the sink drain to the house plumbing system with the appropriate fittings and a P-trap under the sink. Never drain shop water containing paint or solvent into the municipal sewer without appropriate disposal – check local regulations for disposal of shop waste water.
Step 4 – Add a Brush-Cleaning Station
Add a brush-cleaning tray beside or in front of the sink – a simple plastic tray that catches runoff from brush cleaning and can be emptied into the appropriate disposal container. Different brushes need different solvents (mineral spirits for oil-based, water for water-based) – organize the cleaning station to keep these separate.
FAQ
Can I install a shop sink without a drain connection? Yes – use a recirculating system with a large holding tank under the sink. You empty the tank periodically into an appropriate waste disposal container. This avoids the need for drain plumbing but requires frequent attention.
What about hot water? Cold water is sufficient for most shop tasks. If you want hot water for cleaning stubborn finishes or warming water-based glues in cold weather, add an on-demand mini water heater at the sink location – a small unit costs $100 to $200 and heats water instantly without affecting the house water heater capacity.