Build a Japanese Pull Saw Holder

Build a Japanese Pull Saw Holder

A Japanese Pull Saw Holder Japanese pull saws are different from Western push saws in a fundamental way: the blade flexes and is much thinner. This makes them […]

At a Glance
Time in Shop 4–6 hours
Skill Level Intermediate

A Japanese Pull Saw Holder

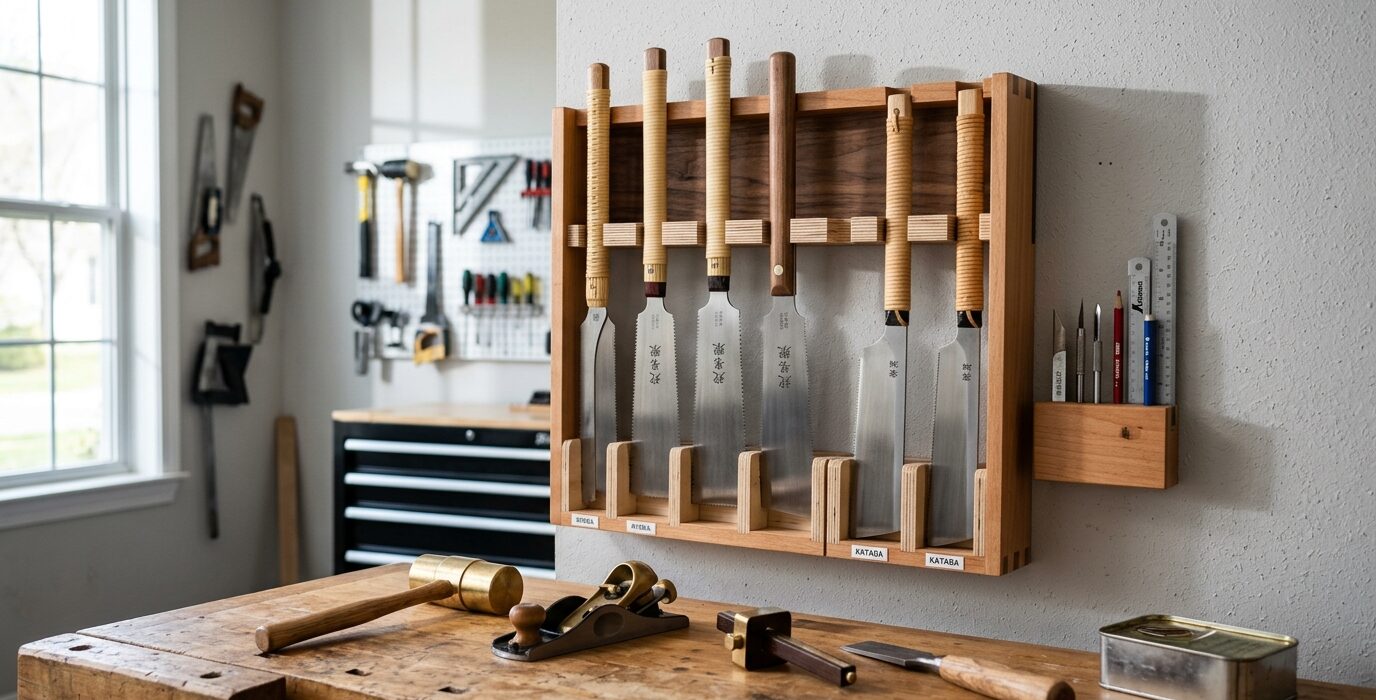
Japanese pull saws are different from Western push saws in a fundamental way: the blade flexes and is much thinner. This makes them exceptional cutting tools but more vulnerable to damage from improper storage. A dedicated holder keeps the blade straight, protects the teeth, and presents the saw handle for easy gripping – without any contact between the teeth and hard surfaces.

Why Pull Saws Need Special Storage

Japanese pull saw blades are typically 0.020 to 0.030 inches thick – far thinner than Western saw plates. A blade stored with contact pressure at any point can take a permanent set. The teeth, which are hardened through heat treatment, are extremely hard but brittle – contact with other metal tools can fracture individual teeth. A hanging storage system that applies no contact anywhere along the blade is the correct approach.

Materials

  • 3/4-inch hardwood for the handle holder peg
  • A plywood back panel for the holder
  • One wooden or synthetic knob as a stop peg
  • Soft foam for blade clearance padding

Step 1 – Build a Handle Peg Mount

Step 1  –  Build a Handle Peg Mount

Most Japanese pull saws have a hole in the handle for hanging. Build a wall-mounted peg from 1-inch diameter hardwood dowel at the right height to hang the saw with the blade angled down and slightly away from the wall. The peg should be long enough (4 to 5 inches) to keep the saw from contacting the wall at the blade or spine.

Step 2 – Add a Blade Support

Step 2  –  Add a Blade Support

At the blade level, add a foam-padded support that the blade rests against lightly. The foam contacts the flat of the blade (not the teeth) and prevents the saw from swinging or rotating while hanging. The support should be very light – just enough to stabilize, not to press against the blade with any force.

Step 3 – Protect the Teeth

Step 3  –  Protect the Teeth

If the saw comes with a plastic tooth guard, use it during storage. If not, cut a slot in a length of rubber weatherstripping foam and slip it over the teeth. The foam guard protects the teeth from contact with anything and protects your hands from the very sharp edges of a quality Japanese pull saw.

Step 4 – Store Replacement Blades Separately

Step 4  –  Store Replacement Blades Separately

Replacement blades for pull saws (most Japanese pull saws have replaceable blades) need their own storage – flat in a slotted holder or in the original packaging. Never store replacement blades loose in a drawer with other metal objects.

FAQ

Can I hang multiple Japanese saws on the same holder? Yes – one peg per saw, spaced 4 to 5 inches apart, keeps each saw hanging freely without blade contact between them. A row of three to five pull saws on a single wall panel is an efficient use of space.

How do I clean a Japanese pull saw? Wipe the blade lightly with a thin coat of camellia oil or other rust-preventive oil after use. Japanese saw blades are not stainless steel and will rust if stored moist. Remove any accumulated pitch with turpentine on a cloth, then re-oil.

Put your shop to work.

Now that the shop is set up, it's time to build something in it. Browse step-by-step project guides at Build This Project.

Browse Project Guides

Free workshop plans, every week.

Join 12,000+ woodworkers and DIYers who get our best shop builds, organization projects, and tips every Tuesday.