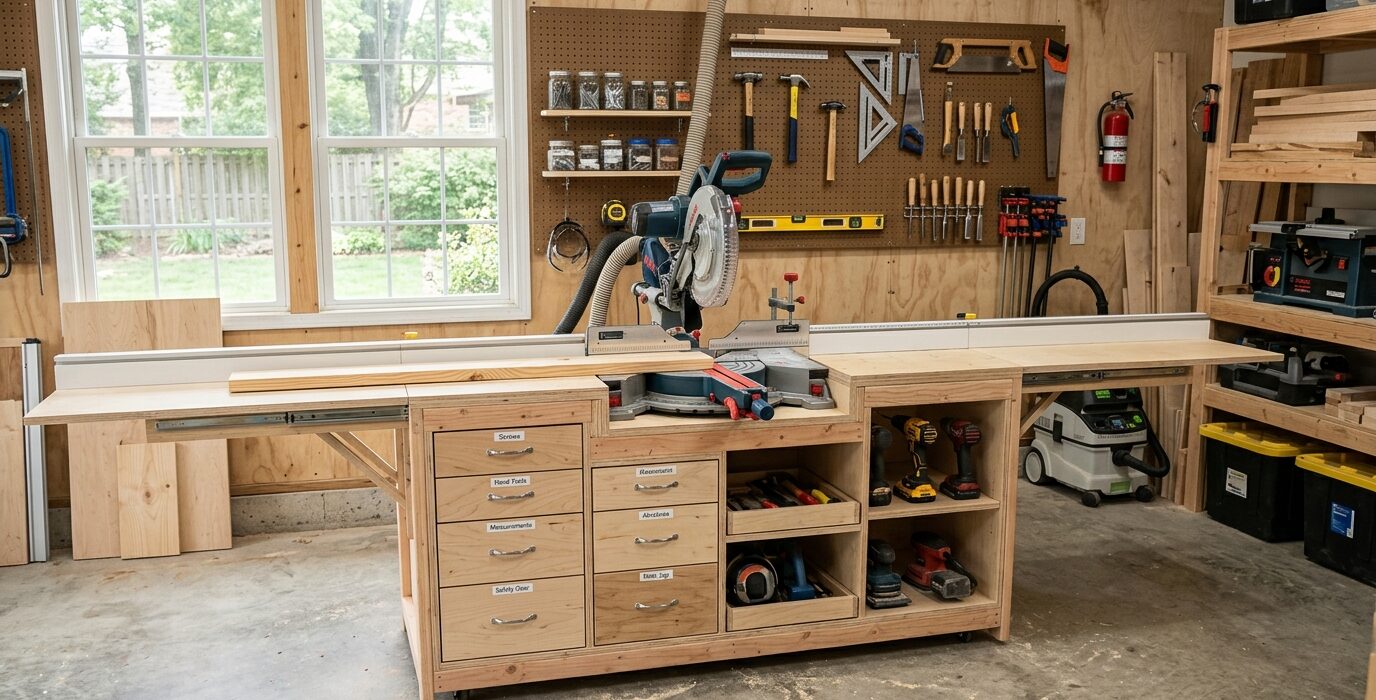
A miter saw station transforms a portable tool into a permanent shop fixture. The built-in wings extend your workpiece support to both sides, the fence runs the full width for repeatable stops, and the cabinets underneath hold blades, accessories, and a decade of offcuts you will eventually throw away. This build takes a full weekend but you will use it every shop session for years.
Design Overview
The station is 96 inches wide total – two 32-inch wing cabinets flanking a 32-inch center section where the miter saw sits. The wings are 3/4-inch plywood boxes with doors. A continuous fence runs the full length at saw-fence height. A dust port in the back of the center section connects to your shop vac or dust collector.
Tools Required
- Table saw or track saw (for breaking down plywood)
- Circular saw or miter saw (ironic but needed)
- Drill/driver
- Router with flush-trim and rabbet bits
- Clamps, tape measure, square
Materials
- Six sheets 3/4-inch birch plywood
- One sheet 1/4-inch plywood (cabinet backs)
- 2-inch pocket screws and pocket hole jig
- Euro-style cabinet hinges (4 pairs)
- 3/4-inch hardwood for the fence face (poplar works well)
- T-track and stop block for repeatable cuts
- Wood glue, sandpaper
Step-by-Step Build
Step 1 – Determine Your Height
The wing height is the most critical measurement. The wings must be exactly level with your saw’s cutting table when the saw sits on the center platform. Measure from the floor to your saw’s table surface, then subtract 3/4 inch for the wing top panel. That is your cabinet height.
Step 2 – Build the Wing Cabinets
Each wing is a simple plywood box: two sides, a top, a bottom, and a 1/4-inch back. Cut parts on the table saw for perfectly square panels. Assemble with pocket screws and glue. Check for square before the glue sets by measuring diagonals – they should be equal.
Step 3 – Build the Center Section
The center section is a platform that raises your saw to wing height. For most saws, this is just a plywood box about 6–8 inches tall, the same width as your saw’s base, and 24 inches deep. Include a dust shelf behind the saw where the dust bag or hose connection will sit.
Step 4 – Connect Everything
Set the center section in position and clamp a wing cabinet to each side. Check that all three tops are flush and level. Screw through the side panels into the center section with 3-inch screws. The whole assembly can be mounted to the wall at the back for rigidity.
Step 5 – Build and Install the Fence
Rip a piece of 3/4-inch hardwood to 3 inches wide and 96 inches long. This is your fence face. Mount it to a plywood backer that runs the full width of the station and attach T-track to the face for a stop block. The fence face must be perfectly straight – joint it or run it through the planer before mounting.
Step 6 – Add Doors and Hardware
Cut door panels to fit each cabinet opening with 1/8-inch reveal on all sides. Install Euro hinges – they are adjustable in all three directions which makes alignment easy. Add magnetic catches to keep doors closed.
Step 7 – Run Dust Collection
Cut a 4-inch hole in the back of the center section and install a dust port fitting. Connect a 4-inch flex hose to your dust collector. Many miter saws have a dust bag – you can remove it and connect directly to the shop system for far better dust capture.
Pro Tips
- Use a long level to confirm all three surfaces are coplanar before final assembly
- Paint the interior of the cabinets white – it makes finding small parts much easier
- Add an LED strip inside each cabinet on a switch
- Route a power strip into the back of the center section for the saw and one accessory