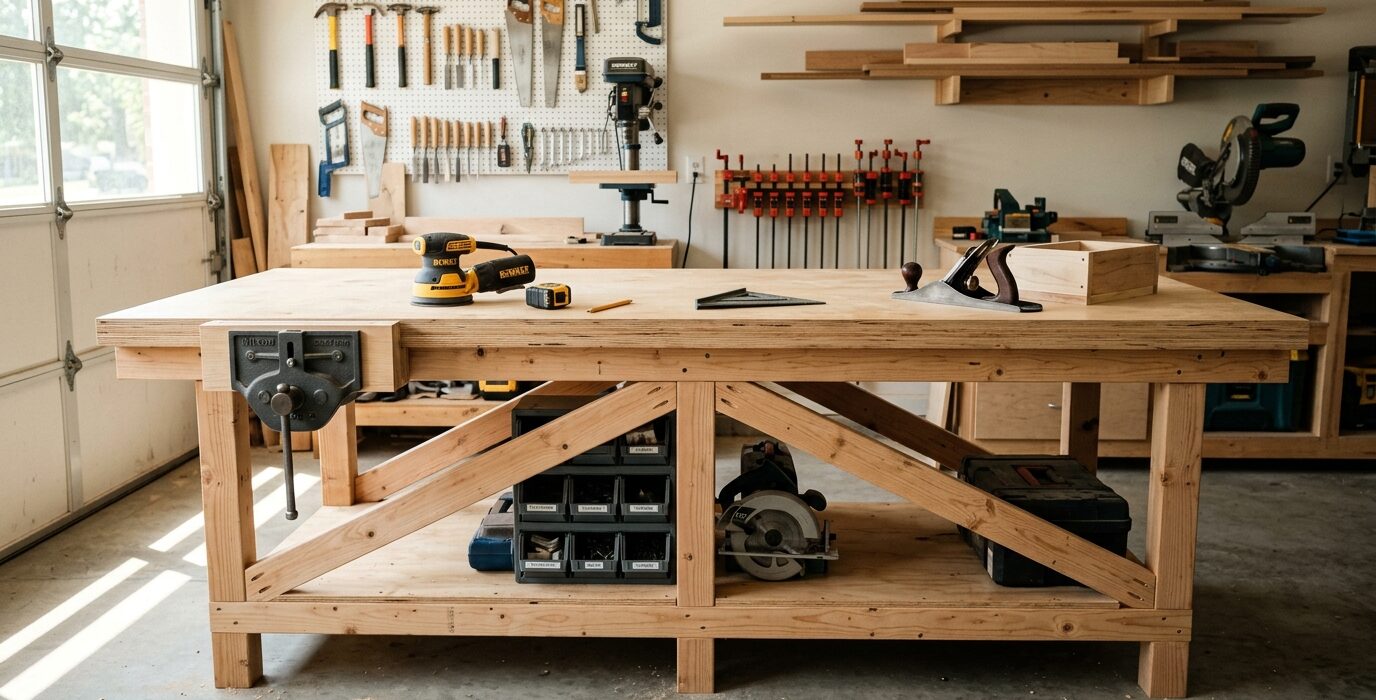
Every serious home shop starts with a workbench. Not a folding table, not sawhorses with a door on top – a real bench that does not move when you plane against it, pound on it with a mallet, or clamp a 50-pound assembly to the edge. This design builds a rock-solid 6-foot bench from dimensional lumber available at any home center for under $200, and you can complete the whole build in a single weekend.
What You Are Building
A 6×24-inch bench at 34 inches high, with a lower shelf for tool and material storage. The top is two layers of 3/4-inch plywood glued and screwed together – flat, stiff, and replaceable when it gets beat up. Legs are 4×4 posts. All frame connections use construction screws, keeping the hardware list simple.
Tools Required
- Circular saw or miter saw
- Drill/driver with bits
- Tape measure and square
- Clamps (6–8 minimum)
- Random orbital sander
Materials
- Two sheets 3/4-inch birch plywood (top)
- One sheet 3/4-inch CDX plywood (lower shelf)
- Four 4×4×8 posts (legs)
- Eight 2×4×8 studs (stretchers, aprons)
- 3-inch construction screws (100-count box)
- 1-1/4-inch screws (for top lamination)
- Wood glue
Step-by-Step Build
Step 1 – Cut the Legs
Cut four 4×4 posts to 33-1/4 inches. The finished bench height will be 34 inches once you add the top thickness. Label each leg so you know which face is outward-facing – the cleanest face goes out.
Step 2 – Build the End Frames
Each end frame is two legs connected by two 2×4 rails: a top rail and a bottom rail. Cut four 2×4 rails at 20 inches (for a 24-inch-wide bench with flush legs). Drill pilot holes and drive two 3-inch screws at each joint. Clamp the assembly flat on the floor while screwing to prevent racking.
Step 3 – Connect the End Frames with Long Stretchers
Cut four 2×4s to 66 inches – two for the top and two for the bottom, one on the front and one on the back. Attach them to the inside face of the leg assemblies, keeping the top rails flush with the top of the legs. Predrill everything to prevent splitting.
Step 4 – Build the Top
Cut both plywood sheets to 24×72 inches. Apply a generous bead of wood glue across the entire face of the first sheet, stack the second sheet on top, align the edges perfectly, and clamp. While the glue is wet, run a grid of 1-1/4-inch screws every 8 inches to pull the sheets tight. Let cure overnight before removing clamps.
Step 5 – Attach the Top
Set the laminated top on the base frame. Drive 3-inch screws up through the top 2×4 rails into the underside of the top – two screws per rail. The top should overhang 3 inches on each end and 2 inches at front and back for clamping access.
Step 6 – Add the Lower Shelf
Cut CDX plywood to fit between the bottom stretchers. Drop it in place and secure with screws from below. Sand the top surface of the shelf to remove splinters.
Step 7 – Sand and Finish
Run 80-grit over the top to knock down any glue squeeze-out and level the seam between the two plywood layers. Follow with 120-grit. Apply two coats of boiled linseed oil for basic protection, or leave bare – a bare wood top is easier to repair and replace.
Pro Tips
- Build the end frames on a dead-flat floor to ensure the legs are plumb
- Use a framing square at every corner before driving screws
- Add a cleat to the wall at each end and screw the bench to the wall – this eliminates racking entirely
- If the floor is uneven, shim the legs and add leveling feet later
Common Mistakes
- Building too short – 34 inches is standard but check your own height first
- Skipping pilot holes – 4×4 posts will split without them
- Not gluing the top – screws alone will not prevent the layers from shifting
FAQ
Can I use cheaper OSB for the top?
You can, but OSB has a rougher surface, absorbs moisture more readily, and is harder to flatten if it warps. Birch plywood is worth the extra cost for the benchtop specifically.
How much weight will this hold?
Easily 500+ pounds distributed across the top. The 4×4 legs are the limiting factor and they are massively overbuilt for most shop use.